Thursday, December 30, 2010

Corsets - Just Cuz

Kathleen is the corset expert.. trust me.  
She's got an encyclopedia's worth up in her noggin.  
Me?  I just think they's pretty.

Christina Hendricks looking like a romance novel cover.

A Victorian Corset

Corset Pattern from 1906

Detail of a corset from 1780 from the book 18th Century Fashion In Detail

The book Underwear: Fashion In Detail

The interior of a corset from 1878

Philip - In Brooklyn 

Wednesday, December 29, 2010

More fun with flower-making...tiny cocktail hat: Part 1

Hello Everyone,

Over the Christmas break, I broke into my out-of-control extensive collection of ribbon and went on a marathon of rosette-making, trying different trims and techniques.


I thought it would be really fun to create a lil' cocktail hat (of sorts) that is festooned in tiny ribbon roses.
Something I could wear when I have drinks lunch with The Ladies, ya know?

So.... I made a small headband-style frame out of wire with a pointed front:
Aluminum wire covered with scraps of printed black cotton.  Heavyweight non-fusible interfacing is used to interline the point for smoothness and comfort.  All edges are clean-finished and whipstitched closed along the back.

Yep, stays in place like a headband! 
 Then I started pinning all the various silver roses on it:
Mmmm-Hmmm!!!  
This hat is intended to be worn with an updo.....think I might add a veil too!


More to come!!

-Kathleen

Fun with Xmas clearance ribbon...

Hey Y'all! 
Hope everyone had a WONDERFUL Christmas holiday! 

We have been hard at work creating and finishing beautiful projects to share with our readers.
While on the subjects of beautiful projects....isn't Philip's latest sweater (Seawolf) f'ing A-MaZING!?!?

It's not every day you find detailed blogs on MEN'S KNITTING, right?! 
Ugh, so much WOOOORK-ness!!

Anyhoo, here are some lil' quickie fun projects I completed just in time to wear for Xmas:  A couple of ribbon rosettes made from holiday ribbon I found for 60% off at Michael's a few weeks ago.

Big-ass Christmas rosette made with 2 different printed ribbons.  Glitter stamen centers (found in the cake-making section @ Michael's) The leaves are 2 different colors of green organza ribbon for just the right sparkle 'n pop!

Another Christmas rosette, made with 2 different kinds of "peppermint twist" printed ribbon for that Willy Wonka effect, lol.   The unusual pill-shaped stamen centers add to the weirdness.  Leaves are pre-cut microsuede available by-the-yard at Stone Mountian & Daughter fabric store, in Berkeley, CA. 

A under-view of the "Willy Wonka" rosette.  Note the matching red clip.  I was super-stoked to discover good quality painted metal clips at the beauty supply down the street...YAY!


-Kathleen, in Oakland

Tuesday, December 28, 2010

Seawolf - Finito!

          Hey there P.H. peeps!  So the day has finally come Seawolf is FINISHED!!!  I got distracted by projects that had due dates but that's forgivable.  In order to finish my baby boy all I had to do was set in the sleeves.  So I pinned those mugs in place and used the yarn tails and back stitched them in place stretching slightly after a few stitches to make sure the seam didn't tighten.  Then I wove in all the loose ends and VOILA, a finished sweater!
CHECK IT!
Please forgive my appearance...
I was snowbound indoors that day so cut me some slack.


For your enjoyment I've included the video "Wicked Blood" by the band Seawolf.  
One of my faves.  Enjoy!


Philip - In Brooklyn

Monday, December 27, 2010

Sea Wolf - Ribbed for Everyone's Pleasure!

            The snow fell in record numbers last night.  Almost 20" in some places!  Hopefully this reaches the outside world before we run out of provisions.  I'm sure it will, the internets is crazy magic.  Since I have so much indoor time on my hands I thought this would prove to be the perfect opportunity to share with you the ribbed collar and pocket ribs I hooked up on Seawolf.

           I learned from a video on machine knitting back in the day how to construct and finish a sweater.  The nice lady recommended sewing on shoulder together then rehanging the neck line back on the machine so you can attach and knit the collar rib all at once.  After the Neck rib is finished you can cast off the rib and seam the other shoulder and neck rib all at once.  It's a great idea and works like a charm.  The only thing I find tedious is casting off rib knit so I found another way to work it out.  So my system is to hold the neck line up to the machine to see how many needles I will need to rib.  But instead of hanging the sweater back onto the machine i just knit the rib as you would any other piece of the sweater.  


          When you reach the proper width you desire you just transfer all the needles onto the knitter and then hang the neckline onto the machine (purl side facing you).  Then you crochet cast off and BOOYAH!  


          The ribbing is complete and sewed on all in one simple and easy step.  The only thing you have to keep in mind is that when conventionally knitting you normally have your end stitches on the knitter, but since you are knitting so that you will be sewing right sides together you will need to have your end stitches on the ribber.  On a crew neck or "U" shaped neck line you can knit the neck rib all in one piece.  On other shapes such as V-Necks and Shawl Collars like mine you will need to knit in two pieces and seam at the shoulder.


           For the ribbing on the pockets I did the same thing.  I used the tails to sew the sides to the body in place.  They turned out just right!  Next up... Attaching the sleeves to the body!


Philip - In Brooklyn

Back to WOOORK!! 12-27-10

            For those of us who have to work this Monday I know that we'll need all the help we can get.  Luckily we have Louise Brooks to help us out.  And thankfully she came with reinforcements... her ensemble!!  Now get back to WOOORK!!


Philip - In Brooklyn

Saturday, December 25, 2010

I Wanna Wish You a Merry Christmas!

Merry Christmas Yall!  
Go get some spiked nog and try not to punch your brother/sister too hard!
Here's hoping you have a good time!

Philip - In Brooklyn

Thursday, December 23, 2010

Twas the Night Before the Night Before Christmas

            And not creature was stirring except the Arrow Shirt Collar Man, reading this classic Christmas tale so a few lucky kids.  Obviously they aren't his kids.  He's too stylish to be saddled with rugrats.  So have a delicious cognac you deserve it. 


Philip - In Brooklyn

Monday, December 20, 2010

Back to WOOORK!! 12-20-10

           Well it's the Monday before Christmas but it's still time to get back to WOOORK!! And since Christmas in the air that means it's time for the endless commercials with lame gift ideas for that special lady in your life.  All the ads that interrupt my stories remind me of one of my favorite "parfume" spots.  Allow this to be the inspiration you'll need to wooork through those rough days before a long weekend.


Philip - In Brooklyn

Tuesday, December 14, 2010

Black Beauty - Just a Taste

            Hey there Patterned History Readers!  I've been beading on Black Beauty off and on and I felt I should throw a picture up to tide you over for a little bit.  I've been adding some beads to the bodice to mirror the beads trickling down the skirt.  So far it's looking pretty rad.  Let me know what you think.

Philip - In Brooklyn

Monday, December 13, 2010

Fun with Lurex

           Hey there Patterned History readers.  Hope your weekend was the bee's knees.  If not I hope who ever ruined your weekend gets what's coming to him.  This weekend I did a bit of sewing and while I was sitting at the machine I decided to bust out some Lurex thread.  I picked this thread up at a little trim store in the fashion district of NYC when I was out buying stuff for a project.  The colors just spoke to me.  Mostly saying "Sparkly sparkly.... buy us," and I couldn't help but obey them.  In order to give the thread more body and make the sparkle more subtle I ran the lurex through the machine with one ply of standard black thread.  When I ran these deco stitches that actually look a bit raised.  It's very luxe... oh la la!  Hopefully I'll find a use for these threads in a project soon!


Philip - In Brooklyn

Back to WOOORK!! - 12-13-10

            Allow me to introduce Alla Nazimova.  Being that it is Monday she'll be helping you get back to WOOORK!!  This striking image of the silent film star from the 1923 release of "Salome" shows some serious use of pearls.  Keep up the good work kiddo!


Philip - In Brooklyn

Sunday, December 12, 2010

Mystery Solved!

            So I did some reading and Googled some film titles and figured out that this little gem is Lili Damita in the 1925 film "Red Heels". I need to check this little puppy out one day.  Look at these faboo scenes below!  Thanks for all the help guys!


Philip - In Brooklyn

Thursday, December 9, 2010

Feast for the Eye


             Um.... Ok.  So this picture, which I ran across on the internet, is AMAZING!  The way she is posing... such grace and elegance.  The cut of that dress is breathtaking.  Now the only problem is I have no idea where this pitcure is from.  It looks like it's a still from a movie, but which one?!  And who is she?  And furthermore, who made her gown?!  I must know!  If anyone has any information please alert the authorities!

Philip - in Brooklyn

Monday, December 6, 2010

Fashion 101: Madeline Vionnet Lecture at the DeYoung Museum, San Francisco

"when a woman smiles, then her dress should smile too."

Hello Everyone!

A few weeks ago, I attended THIS amazing lecture on the Haute Couture creations of Madeline Vionnet:
The lecturer has spent the past 30 YEARS intensively studying and teaching the techniques of Vionnet.  She is also an instructor at The Center for Pattern Design in St. Helena, CA.  It is a magical place that holds drool-worthy workshops on serious smarty-pants fashion stuff.  For instance:  Their next class is a 2-day extravaganza in January 2011 on draping the Dior Bar Jacket:

But I digress….
One can find many sites on the web devoted to Madeline Vionnet’s life and career, and many images of her creations that are timeless and iconic. 
Madeline Vionnet, circa 1920, working on her 1/2 scale dress form.  She did not sketch her creations. Instead, she worked in "3-D" by draping all designs in half scale, then grading up mathmatically to fit the actual human form.

BEFORE THEY ANNOUNCED "NO PICTURES!"  I snapped THIS with my phone:  Half-scale dresses draped and created the "Vionnet Way" from the Center for Pattern Design, on display at the Vionnet lecture. 

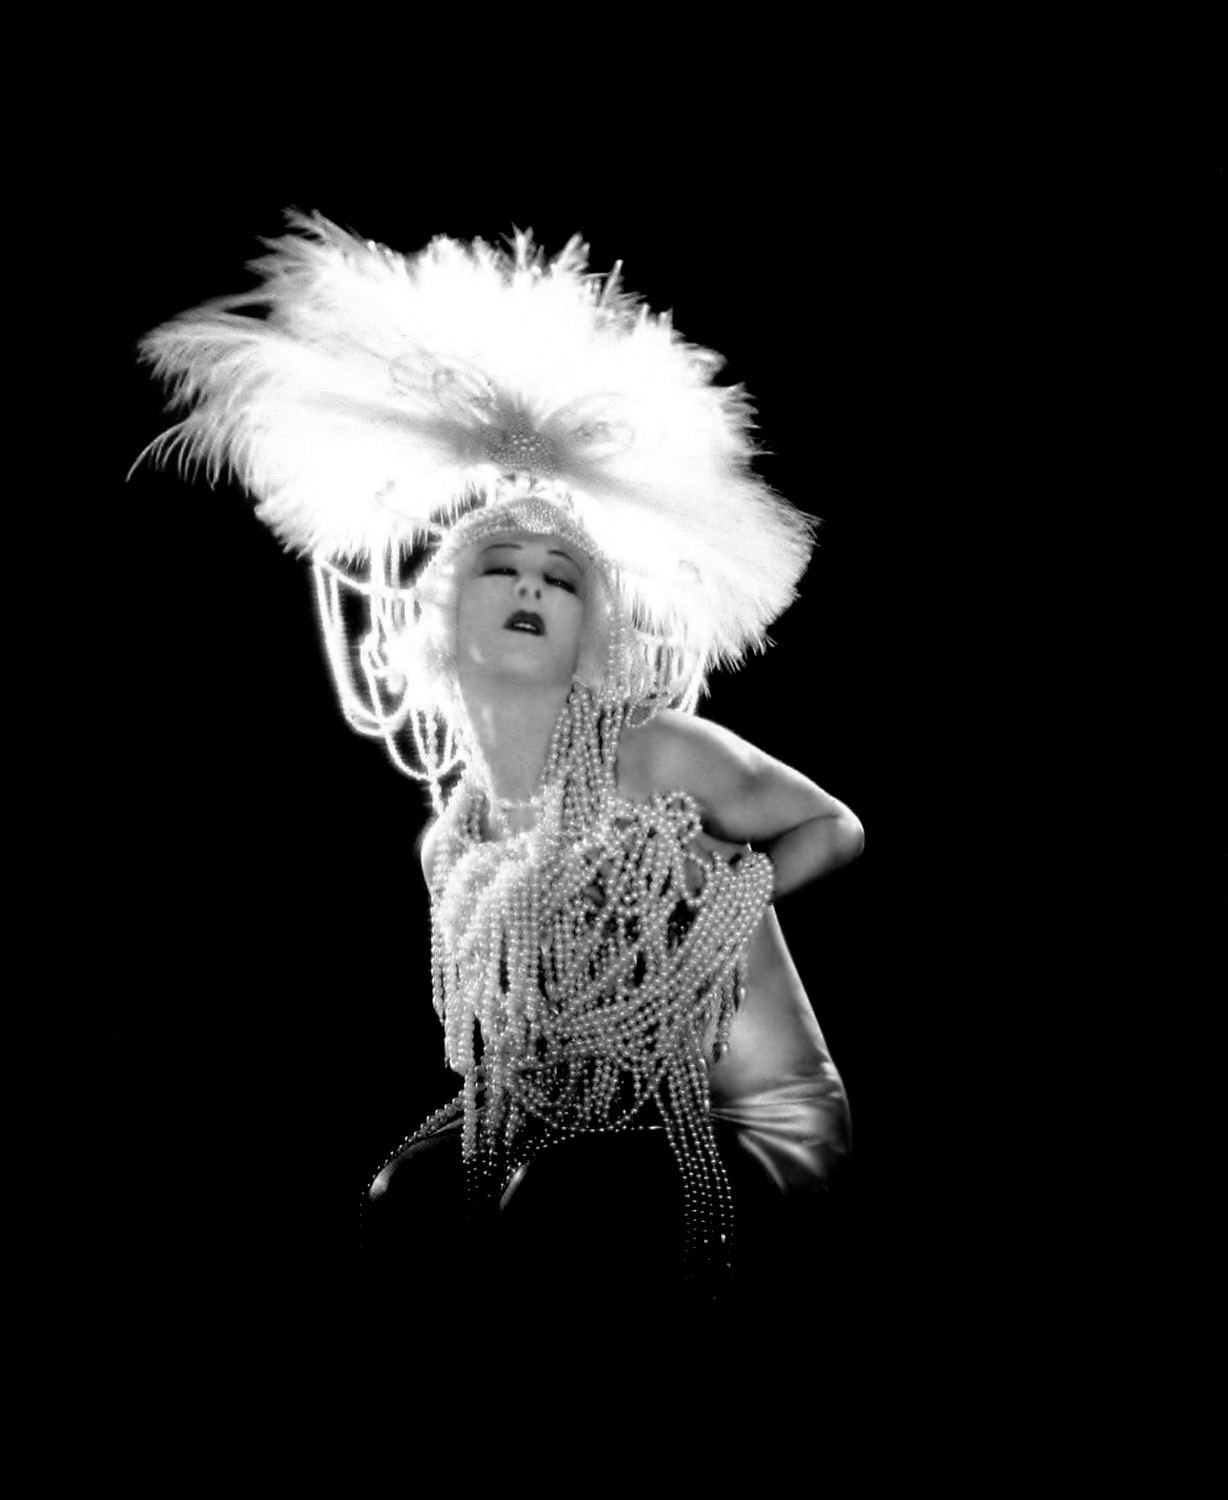
Much like the Cubist art movement which coincided with her own success, Madeline Vionnet was seeing life and the human form on a whole other level, a new dimension in geometric form:

"Woman With Guitar" By Georges Braques, c. 1913
"Le Guitariste" By Pablo Picasso, c. 1910


*Le Sigh!*  A Vionnet Chiffon Gown developed around the same time: 4 equal squares, cut on the straight grain and worn on the bias.  Corners of the squares are joined at the top and draped from the shoulder.  The delicate bias hugs the body beautifully and floats with movement.  Dresses like this were usually finished off with a waist sash or tie to create definition.  All edges are rolled and finished by hand.
 
The lecture was a cool 10 bucks to get in, and worth every penny.  It focused mainly on her principles of design rather than her personal life and timeline.   
Here is a little re-cap of the notes I took at the lecture.
(with LOTS of amazing pictures added in!)
“The cut is all”

Madeleine Vionnet practiced 6 principles of elegant cutting:
1.     Cut Geometrically (circle, square, rectangle) 
2.     Weight creates fit and form
3.     Any part can extend into twist, ties, folds or loops.
4.     Design should integrate the closure  (simple, but never plain)
5.     Decorative details create silhouette, fit & finish
6.     Use insets for specific shaping


c. 1914

c. early 1920's

More Teens-20's Fabulousness. 
Vionnet was often inspired by the geometry of early Grecian style.

Vionnet’s work is nothing short of genius. 
When it comes down to it, she was a fabric mathematician, solving formulas to shape and fit that people are still trying to understand.  

"I have tried all my life to be a physician of the figure.  I wanted to impose on my clients a respect for their bodies, the habit of exercise and the practice of strict hygiene which would rid them forever of those artificial armors that deformed them".

c. 1931 Vogue Magazine (and personally one of my favorite images EVER!)  Note the absolute
unrestricted fit.  A precision-perfect cut & drape gives this creation its ethereal float, and grace.

More early 30's jaw-dropping fabulousness.  Again, note the ease of movement and drape.
This is "Less is More" at its finest!

Recently, I learned that she hated being labeled as or referred to as a Designer.  She chewed up that word and spit it out!  Technician or Dressmaker were titles she preferred.  

Couture Lablel for the House of Vionnet
The House of  Vionnet was one of the most important fashion houses of the 1920s & 30’s.  Approx. 1200 seamstresses were employed at once, and Vionnet was the 1st to create a ready-to-wear clothing from haute couture.
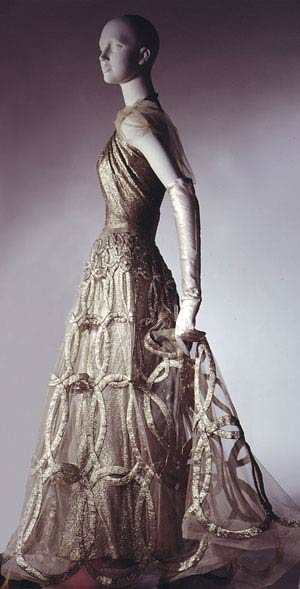
A Vionnet creation from the 1920's

Court Dress, c. 1938
She fought for copyright laws in fashion, and ran a progressive (revolutionary) workplace for the time, offering paid holidays, maternity leave, day care, dental and health benefits…even a gym!
"Blithe Spirit" c. 1938 (Metropolitian Museum of Art, NYC)
Gorgeous Gold Lame' creations, c. 1930's

 The onset of WW2 and the eventual heavy influence of structured, uniform fashion contributed to her (early) retirement from the industry. 
She went on record admitting that she could not and would not change her style and methods of dress design, and therefore believed that her time, her era, was done.

Dress: 1938, Silk Tulle, Panne' Velvet & horsehair, with silver Lame' underdress and Lesage embroidery.

On August 2, 1939, Madeline Vionnet showed her “Farewell Collection” and closed her house that same year, on the eve of war between France and Germany.
Vionnet continued to mentor other designers until her death in 1975.

The Master Technician herself, in her Paris flat, c. 1970's

-Make it simple
-Make sure everything is integrated (function ,cut, behavior)
-Balance is #1


-Kathleen, In Oakland

Related Posts Plugin for WordPress, Blogger...