Showing posts with label 1960s. Show all posts

Tuesday, May 31, 2011

Back to WOOORK!! - 5/31/11

           Yesterday was a holiday, and if you had to work I pity you.  For the rest of us today is our "Monday".  In order to keep our spirits high I thought I'd dig up some work-ness from the movie "Gypsy" starring Natalie Wood as Gypsy Rose Lee.  The montage of Gypsy 'stripping it up' near the end of the movie is one of my favorite scenes.  They squeeze in a few different Orry-Kelly costume changes and the last one is to die for!  The true essence of WOOORK! 


As Gypsy says "And if you're real good.  I'll make you feel good.  I want your spirits to climb!"


Philip - In Brooklyn

Monday, March 28, 2011

Back to WOOORK!! - 4/4/11


          We all know what Doris is thinking.  "Please God.  Let it be any other day than Monday."  After seeing this photo I am promptly putting "The Glass Bottom Boat" on my Netflix que.  Doris Day is bringing it in her Ray Aghayan couture!  WOOORK!

Philip - In Brooklyn

Wednesday, March 23, 2011

My New Frontier: A1960’s cocktail dress: Part Two- Sewing a Wearable Muslin


Hi Everyone! 
Long overdue, its time for PART 2 of my 1960's cocktail dress pattern project!
Part 1 was posted almost a month ago. 

In an effort to use my valuable sewing time to its fullest, I created something called a  “wearable muslin”.   

The 1st cut of my size 10 pattern, graded up from an circa 1960 "size 14", wiich is a modern-day 4-6
 I do this as often as possible when developing or testing a pattern that is fairly simple (for me) and hard to mess up. 

Why did I do this instead of just the plain ol’ muslin mock-up fit process? 
For this dress, I feel confident it can be sewn it up as a real, wearable garment the first time around.  It may not fit 100% perfect, but it will still be adorable and very pretty. 
Keep in mind, if this was a corset project, or a weird bodice pattern I’m Frankenstien-ing, then HELL YES, there will be a plain muslin fitting!!  …. maybe 2 or 3 before the good stuff is cut! 
While creating this wearable muslin, I utilized my time to experiment with different things.  In this case, I made up the dress in funky stripe cotton, with a bias-cut silk waistband and my own construction/finishing techniques. 
Gutsy?!  Maybe. 
Fabric purchased on clearance (1/2 price!) at Stone Mountian & Daugher Fabrics, in Berkeley, CA

OK, here’s what I did:
The bodice is a single layer of the striped cotton, but I omitted the facings for the neck & armhole area included in the original pattern.  Instead, I used single fold bias facing to finish the inside of these areas, and finished by hand:

The zipper was hand-basted to the inside of the side seam, and stitched into the garment by hand.  Don’t be intimidated by this, folks!  In fact, hand-sewing a zipper does not take long at all!  Plus, if you don’t have a lot of experience sewing a zipper in by machine, this can be WAY less frustrating, less damaging to the fabric, and looks like a million bucks every time… even if you are not a super-star hand sewer!


For the waistband, I kind of walked away from the original design/construction. 

The original pattern was just for a single layer waistband of fashion fabric only (front and back with side seams), without any finishing/lining/interlining inside.  Weird?  I thought so too.
To mix things up a little, I created new, revised waistband patterns with center front and center back seams.  Here’s how I did it:


REVISED WB PATTERNS: I cut the bias pieces out of  a scrap of black dupioni (fashion fabric) and the straight-grain pieces out of black cotton (flatlining). 
*Backing or flatlining the bias silk pieces with cotton cut on the straight grain will add stability and strength.
ORIGINAL WB PATTERNS: I cut Waistband pieces as per the original pattern, on the fold, out of black cotton.   These pieces became a lining, which I added in order to “clean finish” the inside. 
I also flatlined the skirt part of the dress with black cotton for added body, and to minimize any VPL in the future ;)
Now the dress is ready to try on and have a fitting!
A little wrinkled: All the seams are sewn up except the shoulders and hem. 
Stay tuned for Part Three:  “Analyzing the fit” where I will be looking at the (almost) finished garment with a critical eye, checking overall balance, dart placement, and making notes of any other little fit tweaks that need to be made.

-Kathleen, In Oakland

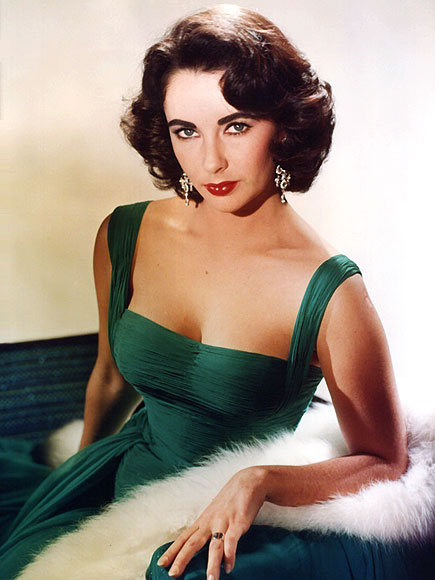
RIP - Elizabeth Taylor

Dame Elizabeth Rosemond Taylor
1932-2011


You will be missed.

Philip - In Brooklyn

Friday, March 11, 2011

Special Collections... INDEED!

            While trolling the "web" one evening I came across the Flickr account for the FIT Special Collections.  They turned out to be a treasure trove of fashion illustrations.  I had to just share them with you guys!  I hope you find them as inspiring as I do!

Balmain Gown
BALMAIN

Dior Suit
DIOR
Balmain Gown
BALMAIN

Gres Gown
MADAME GRES
Philip - In Brooklyn

Friday, February 25, 2011

My New Frontier: A 1960’s cocktail dress: Part One - Introduction & Sizing Up the Pattern

Hi Everyone!

Our adventures in pattern drafting continue with our much loved circa 1960 cocktail dress, Spadea’s # N-1077, otherwise known as Philip’s stunning creation, Black Beauty!

Spadea is a long-gone, mid-20th century pattern company, and their history can be found here.

Philip has already made up this dress as is, in its original size, out of a sumptuous black satin. Then, he proceeded to bedeck, bedazzle, and encrust his creation in iridescent black glass beads.

As you can see, it is a wonderful example of finery and sophistication.   Who wouldn’t be inspired by this amazing work of art?!

Bottom Line:  I want one.  But I want a West-Coast version, made in a cool yet bold Hawiian Barkcloth, with no drape, and embellished with black palette spangles on the solid black background:
I have *just enough* Hawiian Barkcloth fabric to create this dress with no drape...
but how cute will it be?!?!?!
Our Spadea pattern is a vintage size 14, which is a modern day 6, which I am not.
In order to make this style fit, I will have to increase (grade up) the original pattern from a size 6 to a size 8 size 10. 
What is my end goal?? To have a fabulous, flattering real vintage dress pattern that fits me.  This Spadea style is perfect to start with because it is:
1.) Simple – Just a bodice, waistband, skirt, and optional front drape!  The facings at the neck/armhole area can be easily replaced with bias tape to finish the inside, which I plan to do.
2.) Flattering –Bateau neckline, hourglass shape, what’s not to LOVE?
3.) Easy to sew - with areas of opportunity to tweak , simplify or improve the construction quality and finishing.
4.) Versatile –Looks great in anything from Satin to Cotton to Lame’!  Can be made with or without the drape in front for a sleeker, or less formal look.  In fact, without the drape, this is a simple, sweet little boat-neck wiggle dress….wooork!
Well, here I go again….a whole weekend of nothing but tracing & re-tracing patterns, and the results are worth every moment!
The entire original pattern consists of  9 pieces: Front/Back Bodice, Waistband. Skirt, facings, and the front drape.  ***I will be showing the front bodice only as an example of the tracing/sizing up process.  Note: The Front Drape piece will not be included in this 1st dress, but will be explored/sewn at a later date, in a different fabric.

First, I trace all the original tissue pieces, marking all punch holes and perforations.  This 1st tracing is now my master copy, and it will remain unchanged, as an exact copy of the real vintage pattern.


Original tissue pattern from 1960

1st TracingExact copy of the original (Sorry, the photo is light, but you get the idea :)
I create a 2nd tracing from the first, and I make adjustments to the body width and length by slashing & inserting strips of paper.  I have calculated how much I needed to add to the original pattern to make it fit me.  In order to increase black Beauty up to a size 10, I had to add 3 ½” total to the original pattern width, and 1” to the total length.
2nd tracing: slashed and spread to evenly increase length & width.

Here's a lil' breakdown of what I did:
WIDTH: Since the patterns for the Bodice, Waistband, and skirt are placed on the fold and represent one quarter of the body, I divided my total width measurements by 4, then applied that number to each piece.
In other words, 3 ½” divided by 4 is 7/8”, so I added 7/8” to the width of each piece.
LENGTH: I evenly divided the 1” length needed between the bodice and skirt. 
So, ½” was added to the bodice length, and ½” to skirt length.
The best way increase the overall size of a pattern, is to add throughout the body, instead of just adding to the side seams and bottom edge.
I’ve created these quick ‘n dirty images of the bodice and skirt to clearly show what I did, and what you should NOT do: 

Once all the pieces are increased in size, I clean up the overall shape, double check & triple-check notch placement, making sure everything matches and lines up for good sewing.
Now all the pieces are ready to be cut in fabric!
3rd tracing: All cleaned up in a size 10 and ready to use!

Stay tuned for Part Two:  “Sewing a Wearable Muslin” where the dress will come to life in all its size 10 glory!


-Kathleen, In Oakland

Monday, February 7, 2011

Back to WOOORK!! 2/7/11

          Welcome to yet another Monday.  Seriously enough already with this retched day.  On the bright side I have heard from the politico rumour mills that congress has been considering nixing the whole day altogether.  That would be the first good thing they've done in a long time.  So since this day emotes self loathing I felt that we needed a good soundtrack.  Allow me to introduce my close personal friend Dame Shirley Bassey.  So put this video on a loop, crank up the volume and slap the shit out of Monday!


Philip - In Brooklyn
Related Posts Plugin for WordPress, Blogger...