I purchased a Tambour beading tool from Lacis in Berkley, California. The only reason I knew what it was is because many years ago they did a news piece on the House of Lesage during the French Haute Couture fashion shows. They worked from both sides of the fabric using a chain stitch to place the beads or sequins in place. Lesage and other companies that do this type of embellishment. They have the fabric stretched across large frames so that the work is tight as a drum.
I do not have the space in my apartment to have the frame set up that Lesage has, so I had an idea that I would make a smaller frame. That way I can work easily on my lap or counter top. When I was window shopping in an art store I noticed they had canvas stretchers in varying sizes. So I figured this would be the perfect way to build a frame without having to get wood cut to size at Home Depot. I know you find it shocking that I don't own any power tools (except a cheap drill).

The first thing that I did was to drill holes and set screws in to keep the frame square. I padded the frame using quilt batting that is sold by the yard and then covered the batting with fabric that I had left over from a previous project.
I stitched the batting in place by hand.
I mitered the corners so they weren't all thick and lumpy.
The finished frame!
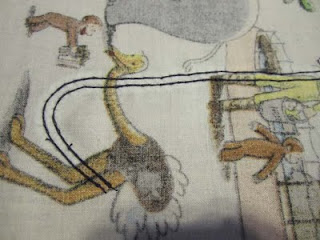
A little sequining experimentation. Curious George has YET to look so fabulous!
The revese side of the fabric showing the chainstitch that forms.
I realized that I need to add some heavy duty staples to keep the fabric and betting in place since it tends to slide inward. The key is to keep the fabric as tight as possible! I need to get my hands on one of those big staple guns.
My pictures make it look like I just hit the ground running but let me tell you it was the exact opposite. The sequins shown was about an hours worth of work. The function of tambour is that you have the hook of the bottom of the fabric and your sequins/beads are strung on a thread on the top side. You are working with the bottom side of the fabric up. Seems simple enough when using organza or other sheers/semi sheers. Then my ming got to going. How in the hell are you supposed to see what you're doing on an opaque fabric?! TO THE INTERNETS!
I found many videos showing people embellishing using a tambour technique. I got super inspired when I saw a video showing them using the hook on the top side of the fabric with the sequins loaded onto the hook itself! This causes the chainstitch to be on the top side but obscured by the sequins. I tried this out with better luck. The technique is still pretty tricky and my motor skills are slowly catching up. I have faith and big plans. Sequins on everything!
Are any of you out there familiar with this technique? Any pointers or words of wisdom you can share would be great! More to come on this technique!
Philip - In Brooklyn


No comments:
Post a Comment