Monday, April 25, 2011

Back to WOOORK!! - 4/25/11

So it's Monday yet again... lovely, I know.  The silver lining though is that through my aimless internet wandering I came across the auctions of the costumes from "On A Clear Day You Can See Forever".  This costume sold for over $8,000 to benfit the Barbra Streisand foundation.  I hope these amazing images of this Cecil Beaton design brighten your Monday.  But seriously.. get back to WOOORK!!!


Philip - In Brooklyn

Monday, April 18, 2011

Back to WOOORK!! - 4/18/11

           It's Monday and we could all use a shot of glamour in our morning cup of Joe.  Today I'm going with some Leslie Caron for desperately needed that pick me up.  Hollywood's French Prima Ballerina is oozing with unscrubbed beauty that most girls pile on the make up to look like. 
           In the 1955 film "The Glass Slipper" Leslie plays Cinderella perfectly.  That hoe shows up to the ball to holler at her man in a gown that is the defenition of WOOORK!!  Not to mention her "F*&# Me Pumps" made of glass.  That bitch is serious!


Philip - In Brooklyn

Monday, April 11, 2011

Back to WOOORK! 4-11-11

Hi Everyone!

It’s Monday.  Again. 
But don’t let the M-word get you down! 
Today’s back to wooork is brought to you by our dear friend, Esther Williams.  In her heyday, this she lived in her bathing suit.  Don’t hate!!  This gal worked hard for the money!!  Making “aquamusicals” was her bread & butter.  Miss Williams spent so much time "dancing" in the pool that she became a co-designer and fit model for Jantzen.  They developed and tested out a new fabric called Lycra, and created swimsuits for her films.  With Esther's input, they contributed to the revolution of womens mass-market swimwear in the 20th century. 
Before Esther Williams, girls swimsuits fastened closed with a metal zipper...and did I mentioned they were knitted out of wool?  Yeah.  Gross.  We have a lot to thank her for.
….imagine if a bikini was your uniform?! 
Now get back to WOOOORK!


 -Kathleen, In Oakland

Wednesday, April 6, 2011

I Wear Many Hats: The Dog Bonnet, a Tribute.

Hey Y’all,

Clothing can be so sentimental. 
Sometimes, it's the most tangible thing you can have to connect with someone that is gone. 
You can see them wearing it, touch the fabric that they once wore, note the creases and wear marks their body made in the garment.  It can be very moving to re-visit.

I wanted to share something I made a long time ago that is very special to me.  
Cotton Calico Bonnet, trimmed in goldenrod yellow grosgrain ribbon.
FRONT VIEW: Modeled by the Medium-sized Doggie dress form at work.
SIDE VIEW:  Earholes have self binding, bottom edge is bound in grosgrain ribbon. 
All hand-finished with tiny pick stitches.


BACK VIEW:  Bonnet is gathered and clean finished into a half-moon yoke.


EAR HOLE DETAIL: 3/8" satin rainbow ribbon was fitted under the ear to hold the brim in place. 
Ruffle brim has folded edge, and is clean finished to the main body with grosgrain ribbon, all hand-finished.


INSIDE VIEW:  All clean-finished inside for Doggie-proof durability!


This fully-functional cotton bonnet was specially created for Honey, our beautiful family dog who changed our lives forever.  Honey was a Yellow Lab/Chow mix, a stray, found abandoned in the little gulf town of Rockport, Texas in 1997.  Thanks to some very well organized small-town vets, we were able to research who she was and her past history.  Honey was originally named Sandy.  Her previous owners even had her fixed, but left her behind in the back yard when the moved away.
And there she was, months later, sitting at a gas station, ready to follow me home.  I called her “Honey” the moment I saw her, and the name stuck ever since.
She was like all Texas ladies I know, TOUGH and BEAUTIFUL.  Honey survived months of abandonment on the Gulf Coast, with the biggest & largest tick infestation I’ve ever seen, AND THEN went through a heartworm treatment! She was already 4 years old when she came into our lives, and lived over 16 years until we had to make the painful decision to put her down.    
Honey was gentle giant, a mother-dog who never fussed about anything….even little children riding on her back was just another day of fun for her, lol.  And boy, did she loved to dress up!  We adorned her in pink baby T’s, tiaras, bunny ears, cat ears (too funny) ….she was just a perfect joy to play with.    PERFECT.
I designed & made this little bonnet to fit her head, and Honey wore it every Halloween when she greeted the Trick ‘or Treaters at the front door with my Mom.  Our little Texas pioneer!
It will always be one of my favorite projects, and proudest accomplishments.
And here's Honey in her younger years....Ain't she lovely?!
-Kathleen, In Oakland

Monday, March 28, 2011

Well Hello, Mr. Rochester!! 1840's Fashion, My Way

 Hi Everyone!
With the release of the new Jane Eyre film this month, I thought it would be fun to share this lil’ dress project I did a few years ago, but didn’t actually get an opportunity to wear it until Dec ’09:
Me, Dec 2009, in my Laughing Moon Round Gown
This dress is the product of a pattern test I did for a lovely lady in Sacramento.  She has her own line of costume patterns, Laughing Moon, and a shop in Old Town Sacramento.  I had the wonderful opportunity to sign up and try out the pattern before it was published for the masses.  A style know as the Round Gown.  She sent an unpublished copy, and I had to make the dress according to the pattern & directions, step by step, to review and ensure the process was clear and highlight any errors/typos in print or wording, ect.
This was a worthwhile experience in more ways than one.  Not only did I create a dress, but I was a contributor to the creation of a historical pattern, and a GREAT one at that!  It can be purchased here. 
But my favorite part, the icing on the cake, was finding a way to actually like dressing up in this particular silhouette in history. 
Women's fashion plate from 1844.
You see, I love the story of Jane Eyre…my sisters and I grew up watching the BBC min-series in the 80’s with insanely handsome and brooding Timothy Dalton, and adore the latest version from 2006!
But frankly, women’s fashions from the mid-19th century scare the shit out of me.  I would not willingly choose this silhouette or even this Laughing Moon round gown to make for myself.  Perhaps it’s those severe center-part hairstyles and bonnets, or the confining drop-shoulder bodices?  Or just the fact that all the women look so …sad?

  We all have era’s of time we are attracted to for different reasons.  That’s why civil war reenactments, Dicken’s and Renaissance faires exist, right?  As much as I love costuming, these time periods have  always been my least-favorite eras of fashion.  Judging by the images of women in these periods of time, it does not look fun or pretty to me. (Such as the Tudor (left) and Elizabethan (right) ladies below)


The Laughing Moon pattern test gave me an opportunity to “make it work”. 
Here I was, faced with the challenge of making a dress from a time I did not care for, so I found a way to like it! 
What inspired me the most? 
Reading bios about various women from the 1840-1850’s.  Women who lived unconventional lives in America and, in particular, California.  Since the Gold Rush started in 1849, California is a wealth of mid-19th century unique inspiration.
And that’s how I stumbled upon this crazy bitch, Lola Montez.
FIERCE: Note the tight leather gloves and what looks like a hand-rolled cigarette. 
My kinda mid-19th century gal!
What a perfect blend of beauty, scandal, and mental illness!  I found her story and images very inspiring.  Lola Montez: "Special friend" to writers Franz Liszt and Alexandre Dumas, Mistress to a German King, dark and dramatic, known for her “Spider Dance”, SHE is the original vamp!  The song “Whatever Lola Wants” was written just for her!  This broad knew how to LIVE!
I ended up making the Laughing Moon Round Gown in a blood red “crackle” print calico cotton.  The cotton makes in so “American” and the bizarre crimson print makes it intriguing and dare I say…sexy?  The buttons I chose for the front closure are actually “Teddy Bear” eyes intended for stuffed animals.  (I didn’t know this until I went up to the counter to buy them…needless to say, it adds to the “crazy” factor.)


My hair was full-on Lola inspired with the bun in the back, a Spanish comb, and curly sides known as Spaniel Ears (not hot).  Miss Lola Montez was basically a white girl pretending to be Latin and exotic, so I accessorized with a Lace Shawl and Spanish fan:


 I went to the Dicken’s Fair in San Francisco looking like this, and felt scandalous and extra-spicy!  Definitely stuck out from the Bonnet & Cape crowd…and since I’m anti-hoop, I felt liberated in my net petticoats!
I was VERY happy with the end result!  So early California! 
Me, Dec 2009: Dicken's Faire @ The Cow Palace, San Francisco.
(yes, that is sawdust on the hem of my dress...classy!)
And that’s how I was able to inspire myself to sport an 1840-50’s round gown! 
By looking to the American West and going outside the Jane Eyre/Dicken’s/European history, I was able to have the mid-19th century “talk to me” in a different way.
Perhaps, one day, I can have that same experience with the Tudor/Elizabethan fashions.  Until then, I can remain content in knowing the Mid-19th Century ain’t so scary anymore.

-Kathleen, In Oakland

Back to WOOORK!! - 4/4/11


          We all know what Doris is thinking.  "Please God.  Let it be any other day than Monday."  After seeing this photo I am promptly putting "The Glass Bottom Boat" on my Netflix que.  Doris Day is bringing it in her Ray Aghayan couture!  WOOORK!

Philip - In Brooklyn

Wednesday, March 23, 2011

My New Frontier: A1960’s cocktail dress: Part Two- Sewing a Wearable Muslin


Hi Everyone! 
Long overdue, its time for PART 2 of my 1960's cocktail dress pattern project!
Part 1 was posted almost a month ago. 

In an effort to use my valuable sewing time to its fullest, I created something called a  “wearable muslin”.   

The 1st cut of my size 10 pattern, graded up from an circa 1960 "size 14", wiich is a modern-day 4-6
 I do this as often as possible when developing or testing a pattern that is fairly simple (for me) and hard to mess up. 

Why did I do this instead of just the plain ol’ muslin mock-up fit process? 
For this dress, I feel confident it can be sewn it up as a real, wearable garment the first time around.  It may not fit 100% perfect, but it will still be adorable and very pretty. 
Keep in mind, if this was a corset project, or a weird bodice pattern I’m Frankenstien-ing, then HELL YES, there will be a plain muslin fitting!!  …. maybe 2 or 3 before the good stuff is cut! 
While creating this wearable muslin, I utilized my time to experiment with different things.  In this case, I made up the dress in funky stripe cotton, with a bias-cut silk waistband and my own construction/finishing techniques. 
Gutsy?!  Maybe. 
Fabric purchased on clearance (1/2 price!) at Stone Mountian & Daugher Fabrics, in Berkeley, CA

OK, here’s what I did:
The bodice is a single layer of the striped cotton, but I omitted the facings for the neck & armhole area included in the original pattern.  Instead, I used single fold bias facing to finish the inside of these areas, and finished by hand:

The zipper was hand-basted to the inside of the side seam, and stitched into the garment by hand.  Don’t be intimidated by this, folks!  In fact, hand-sewing a zipper does not take long at all!  Plus, if you don’t have a lot of experience sewing a zipper in by machine, this can be WAY less frustrating, less damaging to the fabric, and looks like a million bucks every time… even if you are not a super-star hand sewer!


For the waistband, I kind of walked away from the original design/construction. 

The original pattern was just for a single layer waistband of fashion fabric only (front and back with side seams), without any finishing/lining/interlining inside.  Weird?  I thought so too.
To mix things up a little, I created new, revised waistband patterns with center front and center back seams.  Here’s how I did it:


REVISED WB PATTERNS: I cut the bias pieces out of  a scrap of black dupioni (fashion fabric) and the straight-grain pieces out of black cotton (flatlining). 
*Backing or flatlining the bias silk pieces with cotton cut on the straight grain will add stability and strength.
ORIGINAL WB PATTERNS: I cut Waistband pieces as per the original pattern, on the fold, out of black cotton.   These pieces became a lining, which I added in order to “clean finish” the inside. 
I also flatlined the skirt part of the dress with black cotton for added body, and to minimize any VPL in the future ;)
Now the dress is ready to try on and have a fitting!
A little wrinkled: All the seams are sewn up except the shoulders and hem. 
Stay tuned for Part Three:  “Analyzing the fit” where I will be looking at the (almost) finished garment with a critical eye, checking overall balance, dart placement, and making notes of any other little fit tweaks that need to be made.

-Kathleen, In Oakland

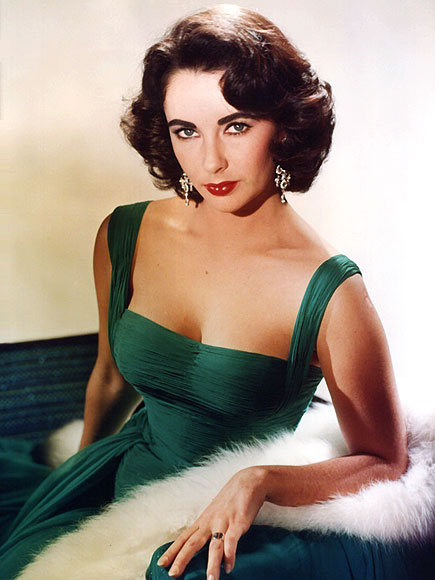
RIP - Elizabeth Taylor

Dame Elizabeth Rosemond Taylor
1932-2011


You will be missed.

Philip - In Brooklyn

100th Post!


That's right!! We've finally reached 100 and we don't look a day over 25.
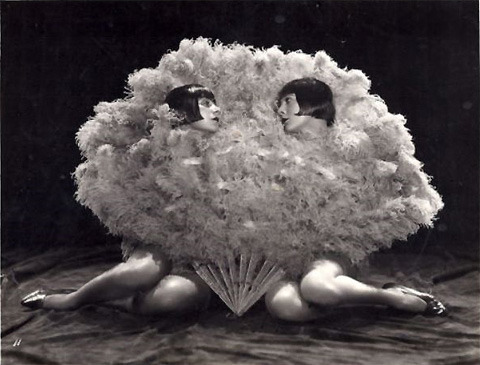
But let's be honest being 100 is the new 40 and ain't it beautiful?!


Philip - In Brooklyn

Monday, March 21, 2011

Back to WOOORK!! - 3/21/11

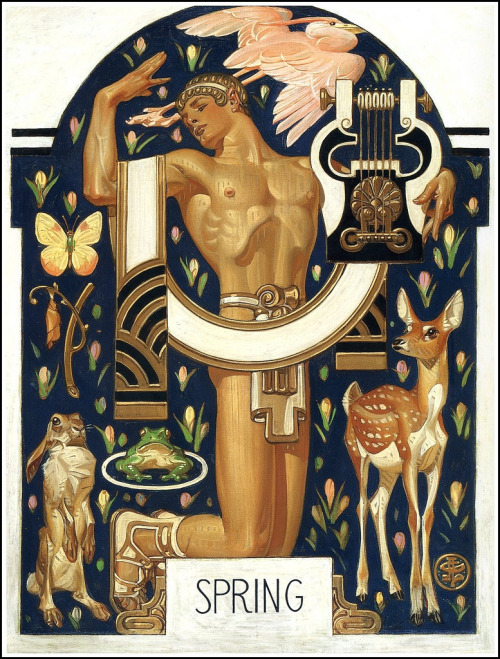
            Ladies and Gents today is the 1st day of SPRING!!  It also happens to be everyone's FAVORITE day of the week... Monday.  So let the bells ring out and let us all rejoice the wonderful season which is Spring!


             We have some help from Mr. J.C. Leyendecker to ring in this most wonderful of seasons, but here in NYC it did little good.  It's raining and threats of snow are on the horizon.  Honestly?!  What is the point of Spring if it's gonna be gross out.  Anyhow enough ranting... get back to WOOORK!!

Philip - In Brooklyn
Related Posts Plugin for WordPress, Blogger...